How to make a better website
Example websites
Example 1: Simplpost.com (it makes itself, as well as other sites)
Example 2: 2Design
Example 3: Auburn
Example 4: BKYS
Example 5: Adin Elegant
Example 6: Dana's Simplpost (30 minutes from PSD to responsive website)
Example 7: Portfolio site
Video guides
Introduction: Beginner level
These four videos walk you through the basic steps of the initial site design options. First is the logo. Uploading a custom designed image logo is usually best, but a text logo can be customized in design step four to look really nice too.Intermediate level
- Templates: loading and saving page layouts
- Styles: colors, fonts and other design options
- Multiple columns of page content
- Slideshows
- Contact forms and other custom form creation
- Background images and custom colors for pages
- Formatting content with Markdown
- Making a store and selling items
- More advanced page layouts
- Recreating other site's designs
- Managing multiple user accounts
- Running sites on other servers (FTP and Amazon)
- Creating larger site structures
- Backing up and exporting a site
- Google Analytics
Advanced level
- Collecting email adresses
- Managing multiple sites
- Transferring Templates and styles between sites
- Creating advanced designs with custom CSS and HTML
- Importing content and transferring entire websites
- Creating and managing themes
- Selling styles, Templates and themes
More videos for intermediate and advanced topics coming soon!
How Simplpost works (FAQ)
Any page layout is possible, but there's a small learning curve for using the different options involved. The default layout is one linear column, but you can place content side-by-side when multiple columns are enabled in Page options. A gray placeholder will show valid spots content can be moved to as you drag it around.
Using Sections allows you to do more advanced layouts. Pages inside a Section can be used as blocks to assemble more complicated designs. Page content in a Section can only be dragged around inside of that Section though.
A Style contains all the design settings (colors, fonts, etc...). Technically it is the CSS code. Site Styles contain all the settings on the Site options menu page. Page Styles include all background images and color settings under Page options. You can save Site Styles and Page Styles separately, and load them any time.
A Template contains all the layout and content settings of a page. Technically it is the HTML code. A Template contains those settings for just one page. A full website is made up of a unique combination of Templates. You can save a Template with any name you want for reloading later. Or load one of the default Templates to quickly get started with a new page. Loading a Template replaces all content on that page, so be sure to save any content you do not want to lose before replacing it.
Every web page has its own file folder containing its content. A Section is simply a page/folder that contains other pages/folders. A common example is a site's blog. The blog shows and links to the multiple blog posts it contains. A Section is a page folder that contains other pages/folders. For example, an online store Section could have multiple web pages inside it; one page for each item for sale.
You can start a new Section on any page by clicking the New page button in the Add content menu. Or adjust the number of pages in the Page options menu. Each page inside a section can have a unique Style and Template, so you can use them to assemble more complicated page layouts and designs. The flexible and modular principles of Sections lets you make any page design you want.
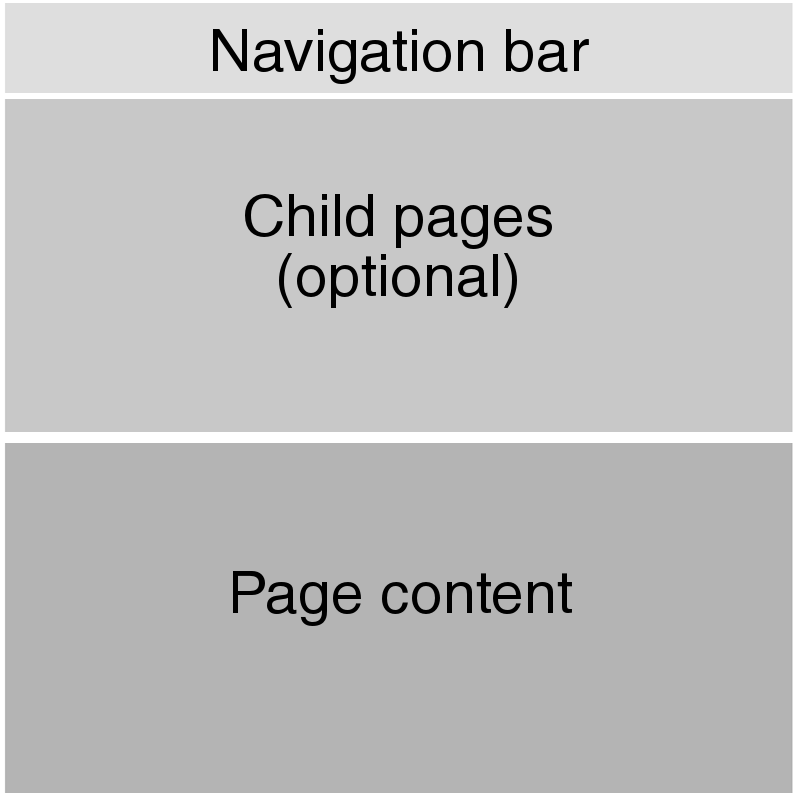
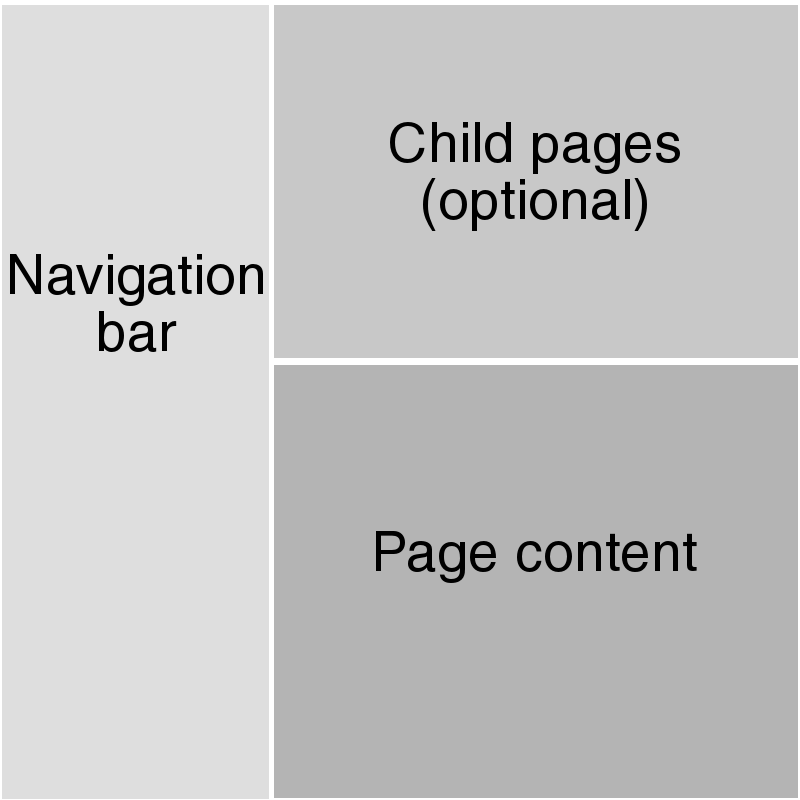
A Section page can be as big or small as you want. And any content added to a page will always show up below the Section of pages. Each page inside a section has its own independent page options (design and layout).
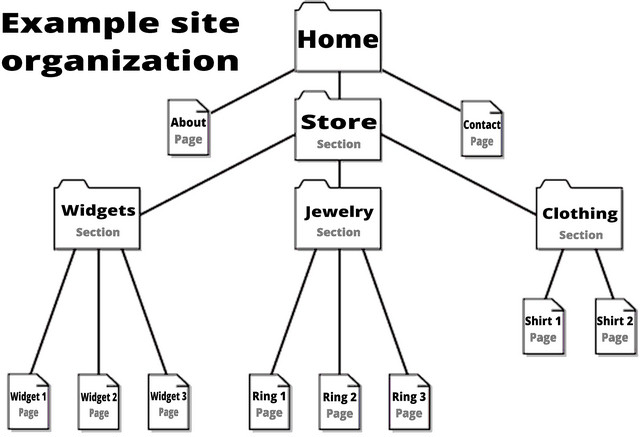
Your website has a tree-like structure that can be visualized like this:
Or you can visualize it as a file tree like this:
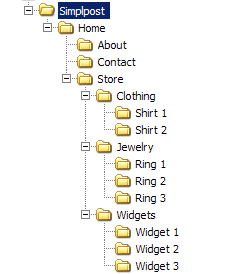
Simplpost literally makes a folder for each web page, and you can organize these folders/pages however you like. There is always going to be a hierarchy to the organization of folders you build.
Each page needs to be published for it to be publicly viewable by everyone. Click the Published checkbox next to the Save page button to publish any page. And un-check it to hide that page from public view. Each individual page must be published on its own to be viewable (even in a Section).
Your public home page address:
http://simplpost.com/[SITE NAME]/
Your private admin interface address:
http://simplpost.com/[SITE NAME]/interface/
Use the secure admin interface to edit your site's pages. And then each published page will be viewable to everyone on the public version of your site.
Only published content will show up on your public wesite. Each page must be individually published. And content inside a section (like a blog post or photo in a gallery) must have the associated page published to be viewable by everyone. Use the View page link to see the public view.
Set the number of web pages to zero in the Page options menu (Section of 0 web pages).
Each web page has its own folder. Sections are basically folders that contain one or more other web pages (folders). Your site can be as simple or complex as you want. Here's what this structure can look like:

Or you can visualize it as a file tree like this:

Simplpost literally makes a folder for each web page, and you can organize these folders/pages however you like. There is always going to be a hierarchy to the organization of folders you build.
Every page in your website should update automatically after a change in the design settings. Sometimes you have to reload a page to get your brower to refresh the updated settings though. Also check to make sure a page doesn't have its own custom design settings. Those custom pages will stay independent and not update when the rest of the site pages do.
A headline is a page heading or header. The first headline on a page is usually the page title. You can add other headliness for sub-headings or however you like. Add a new one to any page using the button in the Add content menu.
Usually this would be a paragraph, or a group of multiple paragraphs. You can use Markdown syntax in these for more complicated text formatting or HTML (see below, subscription required).
A spacer is a simple way to add a blank spot to any part of a page. You can use it to add more white space anywhere on the page. Or maybe you want to create a slideshow with no text or content on top of the images. You can make spacers any height you want in the Add content menu. Click to fine tune the height in pixels or to delete one easily.
Breadcrumb links are a navigation helper that shows users where in the site hierarchy the current page is located. They are a navigation tool that makes it easier to browse a site with many pages on different levels. So if you go a few levels deep you can easiliy jump around the site. Smaller sites might not need these.
Just copy and paste the YouTube video URL (example = http://www.youtube.com/watch?v=PoQOvgl2K5I) into a Body of text on any page. It will automatically be embedded in the public version of the page (check published, and then the view page link to see it). The actual video will only be visible on the public view of the page though. Pro accounts can also use the widget feature add YouTube videos to a page.
Turn any image on a page into a slideshow by clicking the image, and then clicking the \"Slideshow\" button. Simply add one or more images, and they will be displayed there as a slideshow. You can click on any slideshow to pop open the menu with all the options available.
You can also make a background image slideshow. The first step is to add a background image in Page options. Then add any additional background images to create a slideshow. On that page they will be displayed in full screen mode . And background image slideshows will take up the entire page's area of a Section when \"full size\" is set.
Drag the item to the trash can (bottom left corner) and release it to delete that content. Photos and spacers can also be deleted by clicking on them and hitting the delete button. Text content can also be deleted simply by selecting it all and hitting delete. Deletions are only permanent after a page has been saved. Reloading a page before hitting the Save page button will restore the page to the last save point and lose any changes made. Pages in a Section cannot not be deleted using the trash can. You must click it to edit content on that page.
If you have the Facebook and Twitter buttons turned on for your site, then these buttons only show up on the public view of a page. This is to prevent accidental liking or tweeting the private pages inside your site's interface (which no else can see).
You can insert a break with a Continue reading » link for any page in a Section by inserting the following markup:
Just type that whereever you want the break in content to occur in a body of text. The most common use is for previewing blog post contents, but you can use this feature for any type of page.
Yes, you can rename your site at the top of the first design page. You cannot change the root simplpost.com/my-site-name/ URL of a site once created though. Currently you need to make a new site on simplpost.com if you want a new URL. You can run your Simplpost site on any domain name you want regardless of this URL though (like www.example.com). Then the Simplpost.com URL will only be used for editing your site.
Markdown syntax let's you center text, post online images, post links, bold text, headings and much more. You need a paid subscription to enable this feature. You can switch the text format between plain text, Markdown syntax and HTML in the Page options menu.
Markdown syntax is a simple programming language that let's you create HTML formatting code like links, lists, headings, bold and italic text. It's a simple way to enable more options for designing content on your pages. Here's a how-to guide with examples.
For security and anti-spam reasons only sites with a Pro subscription can use HTML editing features. Pro subsciptions also help keep Simplpost running, and require more support for the advanced functionality. Personal accounts can use Markdown to more easily format content.
HTML stands for HyperText Markup Language. It is the universal programming language used for creating pretty much every web page on the internet. HTML code consists of tags enclosed in angle brackets that give structure and meaning to the web page. HTML enables you to place any kind of content into your website and gives you full control of your web pages.
If you have a subscription then adding a contact form is as simple as entering this text in a page body:
And you can create custom forms by adding whatever labels you want separated by commas like this:
You can have up to 20 different custom form field names in each form. The actual form will only be visible on the public view of the page. And make sure you have set an email address on your Account page, as this is how you receive form submissions.
To change the button text just add an additonal text code at the end of the form parameters like this example:
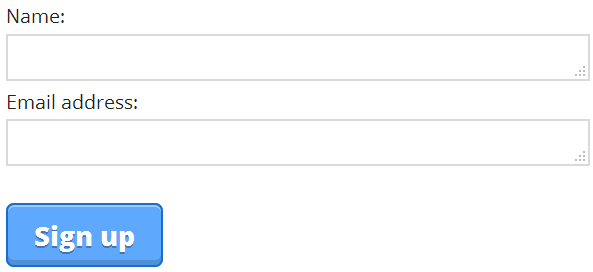
The above code will make a form that looks like this:
You can add any kind of widget from any service, or make your own. You just need to copy and paste the widget code into the Widget section of the Add content menu. This features requires a Pro subscritpion though. You can use services like Disqus to add comments to any page. The widget code should be in HTML and/or Javascript. This feature can also be used to add any additonal code you want to a page.
RSS feeds are automatically generated for any page that has a section of pages on it. So if you make a blog or photo gallery type of page it will automatically generate the code for the RSS feed and take care of everything for you. The link to the rss.xml file will be placed in the public view of the page when it's published. This enables all RSS readers to automatically receive updates of your website pages.
Your public home page address:
http://simplpost.com/[SITE NAME]/
Your private admin interface address:
http://simplpost.com/[SITE NAME]/interface/
Use the secure admin interface to edit your site's pages. And then each published page will be viewable to everyone on the public version of your site.
Subscriptions pay for Simplpost's overhead and development. You get tech support and the peace of mind that Simplpost will be around forever. There's a 30 day free trial to try out Simplpost to make sure it's right for you. And we will work hard to make sure you get more value out of Simplpost than you put into it.
